Invoices Summary
Invoices let you bill clients for completed jobs or approved quotes. You can select a client, link the invoice to a job or quote, and add line items for services or products provided. The system automatically calculates totals, applies discounts or taxes, and allows partial payments if enabled. Invoices can include comments, due dates, and are exportable as PDFs for easy sharing with clients.
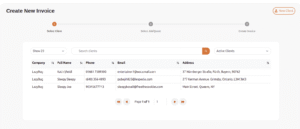
Step 1: Select the Client
-
Here you’ll see your client list with columns for Company, Full Name, Phone, Email, and Address.
-
Use the search bar or dropdown (Active Clients) to quickly find the right client.
-
Click on the client row
-
Once selected, you’ll move to Step 2: Select Job/Quote.
Step 2: Select Job or Quote
- After picking the client, you’ll see all associated jobs or quotes linked to them.
-
Choose the job/quote that you want to bill for.
-
This ensures the invoice automatically ties back to the work already recorded (avoiding double entry).
-
Once chosen, you’ll move to Step 3: Create Invoice.

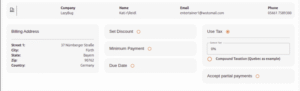
Step 3: Create Invoice
-
Billing Address is automatically pulled from the client’s details.
-
You can adjust financial options:
-
Set Discount – percentage or amount off.
-
Minimum Payment – if you allow partial payments.
-
Use Tax – choose applicable taxes, and you can check Compound Taxation.
-
Due Date – set when payment is expected.
-
Accept Partial Payments – toggle this on if you’ll allow
-
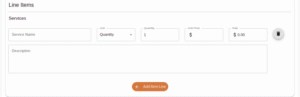
Step 4: Add Line Items
-
Under Line Items, add services or products provided:
-
Service Name (e.g., Terminate Bugs, Maintenance, Installation).
-
Unit (Hours, Quantity, Item, etc.).
-
Quantity – how many units you’re billing.
-
Unit Price – cost per unit.
-
Total auto-calculates.
-
Description – optional notes (e.g., “Bug termination includes diagnostics and resolution”).
-
Click + Add Item Line for each additional service/product.
Step 5: Invoice Comments
Use this space for notes to the client (e.g., “Thank you for your business. Payment due in 15 days.”).
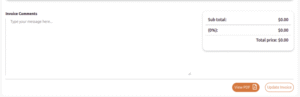
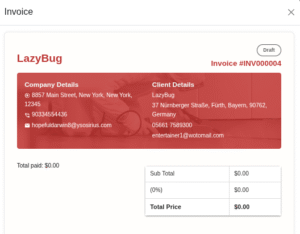
Step 6: Review & Save
-
The Sub-total, Tax, and Total price will update automatically.
-
When done, click Save Invoice (or Update Invoice if editing).
-
You can also View PDF to preview the final invoice and download/email it.